
Loading the latest stories…
Whether you weave on a multishaft loom or a rigid-heddle loom, you need to have some way of fastening your warp to the cloth beam.
Susan E. Horton3 min read
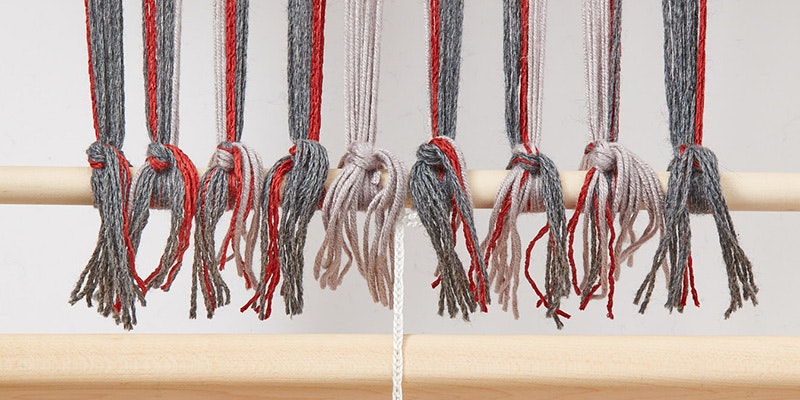
Whether you weave on a multishaft loom or a rigid-heddle loom, you need to have some way of fastening your warp to the cloth beam. If you warp your loom from the back or the front, the last step before throwing your first pick is attaching your warp ends to the front apron rod.
Probably the most common way is tying onto the apron rod using lark’s head knots, adjusting tension, and then tying a square knot to secure the lark’s head knot. After you have wound your warp onto the warp beam in the back and sleyed it through the reed or rigid heddle, follow these steps to tie onto the front apron rod.
Secure the apron rod in front of the loom’s front beam with 3 or 4 inches of space between the apron rod and the front beam.
Pull your warp out straight across the apron rod. At a minimum, you will need about 3 inches of warp to tie your knots. If you are weaving a scarf, add a few inches if you want long fringe. Remember that you will be weaving a header, which will also give you an inch or so to use for fringe. If your warp extends too far past the apron bar, wind it back until it is at the correct spot. If it is too short, release some warp from the cloth beam. I find it is easier to work if all of my ends are about the same length, so I trim any long ends at this point.
When tying onto the apron bar, I recommend ½-–1-inch bouts. Larger bouts are difficult to tension and require wider headers to even out the warp ends when you start weaving. I also recommend that all of the bouts have roughly the same numbers of ends. For harness looms, all ends in the same dent should be kept together in a bout to avoid putting pressure on any individual thread. Use even numbers of ends in your bouts for ease in dividing them.

Step 1. Divide bout in half. Photo credit: George Boe

Step 2. Tie overhands knots using the two halves of each bout. Photo credit: George Boe

Step 6: Secure the lark’s head knots with square knots. Photo Credit: George Boe
You are now ready to weave your header.
Weave well,
Susan
More from Handwoven
From the Library






Comments
No comments yet — be the first to share your thoughts.
Sign in to join the conversation — commenting is for signed-in members.